Self-Hosting acme-dns on a Hetzner VPS with Docker

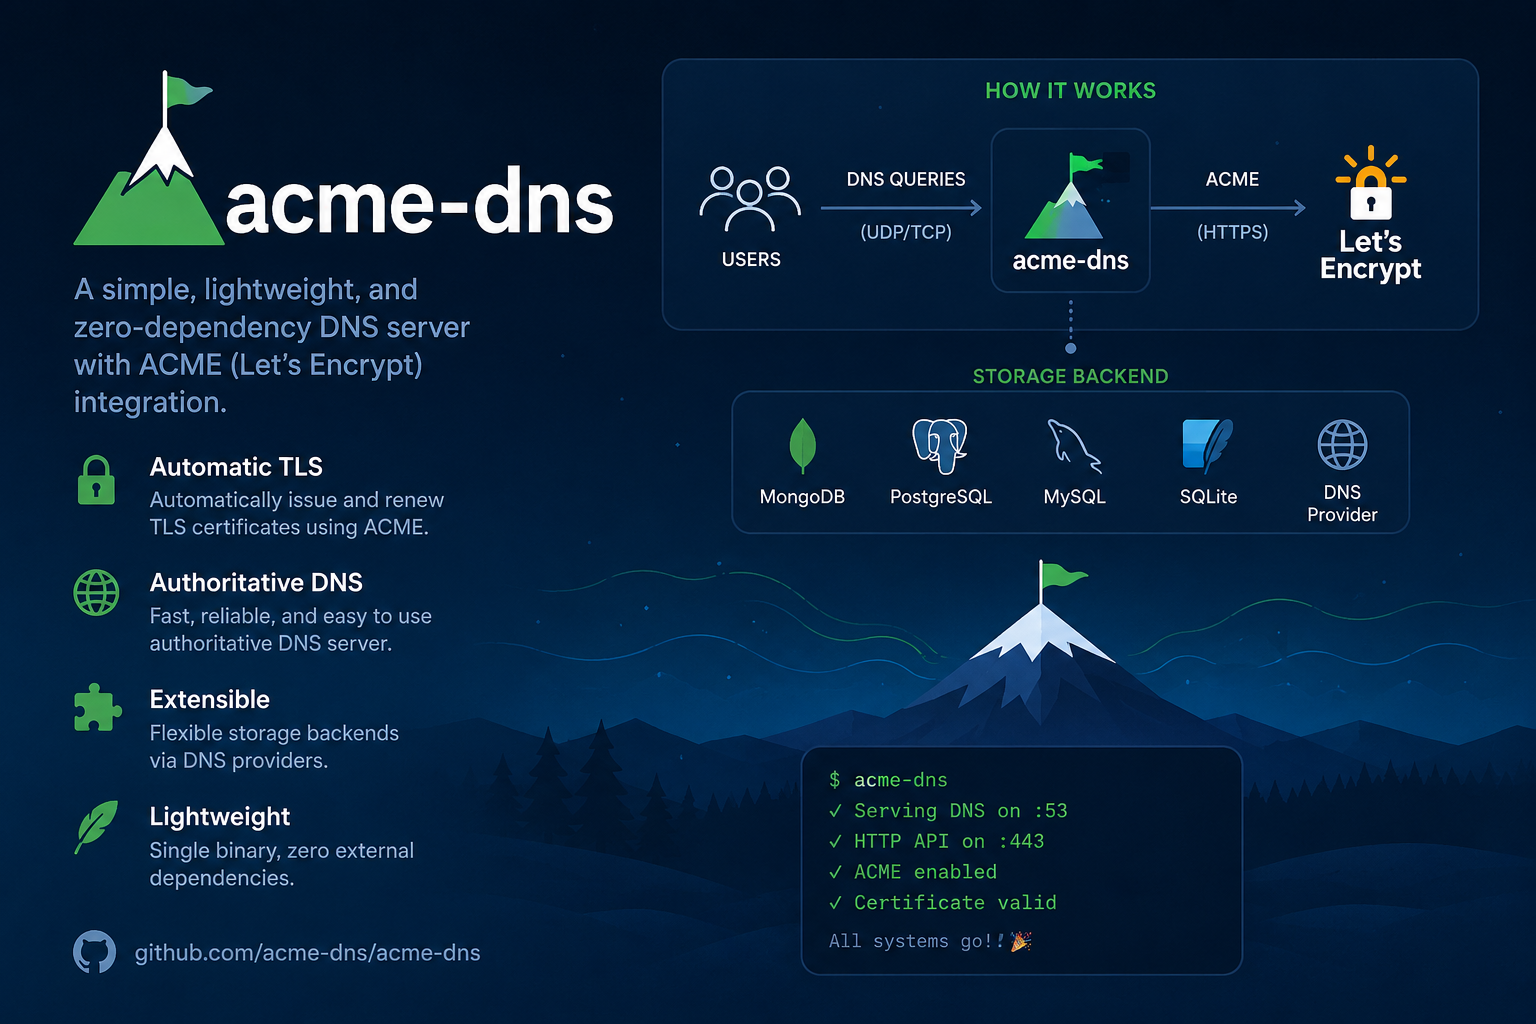
If you've ever tried to issue a wildcard TLS certificate — the kind that covers *.yourdomain.com — you've run into a hard requirement: the DNS-01 ACME challenge. And if you want to automate that challenge without handing your entire DNS zone over to a script, acme-dns is the cleanest solution I've found.
This post covers what acme-dns is, why it exists, and a full walkthrough of how I set it up on a Hetzner VPS using Docker — including the twist of running the REST API on port 8181 instead of 443 because Traefik already owned that port.
The problem: wildcard certs require DNS-01
Let's Encrypt issues certificates using the ACME protocol. There are a few challenge types, but for wildcard certificates (*.yourdomain.com), only DNS-01 works. The way it works: Let's Encrypt asks you to prove domain ownership by creating a specific _acme-challenge TXT record in your DNS zone.
That's straightforward for a one-time cert. But for automated renewal, your ACME client needs write access to your DNS zone — indefinitely. Most DNS providers give you an API token for this, which is convenient but concerning: if that token leaks, an attacker can rewrite your entire DNS zone.
The solution: acme-dns
acme-dns by Joona Hoikkala solves this with a clever indirection. Instead of giving your ACME client access to your real DNS zone, you:
- Stand up a tiny, purpose-built DNS server (acme-dns) on a subdomain — say,
acmedns.yourdomain.com. - Delegate that subdomain to acme-dns via an
NSrecord, making it authoritative for anything under that subdomain. - Add a one-time
CNAMEin your real DNS:_acme-challenge.yourdomain.com→<uuid>.acmedns.yourdomain.com. - Your ACME client only ever calls the acme-dns REST API to update
_acme-challengeTXT records on that narrow subdomain.
From that point on, your ACME client never touches your real DNS zone again. It has credentials for acme-dns only, and acme-dns can only manage records within its own delegated subdomain. The blast radius of a leaked credential is essentially zero.
Requirements
Before you start, you'll need:
- A VPS with a public IP. I used Hetzner Cloud (CX22 — 2 vCPU, 4 GB RAM, more than enough). Any provider works: DigitalOcean, Vultr, Linode, etc.
- A domain with access to your DNS provider's control panel or API.
- Docker and Docker Compose installed on the VPS.
- Ports open on your server firewall:
53/tcp,53/udp, and whichever port you use for the REST API (443or a custom port like8181). - A subdomain to dedicate to acme-dns (e.g.,
acmedns.yourdomain.com).
Step 1: DNS records at your provider
Log into your DNS provider and create two records for your acme-dns subdomain.
General (any provider)
| Type | Name | Value | TTL |
|---|---|---|---|
A |
acmedns.yourdomain.com |
YOUR_VPS_PUBLIC_IP |
300 |
NS |
acmedns.yourdomain.com |
acmedns.yourdomain.com |
300 |
The A record points the subdomain at your VPS. The NS record delegates authority for that subdomain to itself — meaning your acme-dns server becomes the authoritative nameserver for *.acmedns.yourdomain.com.
Cloudflare-specific notes
If you use Cloudflare, there are two things to watch out for:
Set the A record to DNS only (grey cloud). Cloudflare's proxy (orange cloud) only supports HTTP/HTTPS traffic on a limited set of ports. DNS traffic on port 53 cannot be proxied, and attempting to do so will break resolution. Click the orange cloud to make it grey.
NS records at the subdomain level work fine in Cloudflare — you don't need to do anything special beyond adding the record as shown above.
Step 2: Server setup
SSH into your VPS.
Install Docker (Ubuntu)
Docker provides an official APT repository for Ubuntu. This is the recommended installation method and makes future updates easier to manage.
For the latest installation instructions, refer to the official Docker documentation:
Docker Engine installation guide for Ubuntu
Install Docker using the official repository:
Remove any old Docker packages
for pkg in docker.io docker-doc docker-compose docker-compose-v2 podman-docker containerd runc; do
  sudo apt-get remove -y $pkg
done
Update package index and install prerequisites
sudo apt-get update
sudo apt-get install -y ca-certificates curl
Add Docker's official GPG key
sudo install -m 0755 -d /etc/apt/keyrings
sudo curl -fsSL https://download.docker.com/linux/ubuntu/gpg \
  -o /etc/apt/keyrings/docker.asc
sudo chmod a+r /etc/apt/keyrings/docker.asc
Add the Docker repository
echo \
  "deb [arch=$(dpkg --print-architecture) signed-by=/etc/apt/keyrings/docker.asc] \
  https://download.docker.com/linux/ubuntu \
  $(. /etc/os-release && echo "$VERSION_CODENAME") stable" | \
  sudo tee /etc/apt/sources.list.d/docker.list > /dev/null
Install Docker Engine and Docker Compose
sudo apt-get update
sudo apt-get install -y docker-ce docker-ce-cli containerd.io \
  docker-buildx-plugin docker-compose-plugin
Verify the installation:
sudo docker run hello-world
If you'd like to run Docker without sudo, add your user to the Docker group and log out and back in:
sudo usermod -aG docker $USER
Open the required ports. On Hetzner, do this both in the Hetzner Cloud Console (Firewalls section) and on the server itself:
# UFW
ufw allow 53/tcp
ufw allow 53/udp
ufw allow 8181/tcp   # or 443 if that port is free
ufw reload
Note for Hetzner users: Hetzner has both a network-level firewall (in the console) and the OS-level firewall (UFW). You need to open ports in both places.
Step 3: Project files
Clone or create the following project structure on your server:
acme-dns/
├── Dockerfile
├── docker-compose.yml
├── config/
│   └── config.cfg
└── data/              ← mounted volume; this is where the SQLite database will live
Dockerfile
This builds acme-dns from source using a two-stage Go build, then packages the binary into a minimal Alpine image:
FROM golang:alpine AS builder
LABEL maintainer="joona@kuori.org"

RUN apk add --update git

ENV GOPATH /tmp/buildcache
RUN git clone https://github.com/joohoi/acme-dns /tmp/acme-dns
WORKDIR /tmp/acme-dns
RUN CGO_ENABLED=0 go build

FROM alpine:latest

WORKDIR /root/
COPY --from=builder /tmp/acme-dns .
RUN mkdir -p /etc/acme-dns
RUN mkdir -p /var/lib/acme-dns
RUN rm -rf ./config.cfg
RUN apk --no-cache add ca-certificates && update-ca-certificates

VOLUME ["/etc/acme-dns", "/var/lib/acme-dns"]
ENTRYPOINT ["./acme-dns"]
EXPOSE 53 8181
EXPOSE 53/udp
docker-compose.yml
Notice that 443 is commented out — on my setup, Traefik already owns that port, so I use 8181 for the acme-dns REST API instead:
services:
  acmedns:
    build:
      context: .
      dockerfile: Dockerfile
    image: yourusername/acme-dns:latest
    ports:
      # - "443:443"   # Uncomment if 443 is free; otherwise use 8181
      - "53:53"
      - "53:53/udp"
      - "8181:8181"
      # - "80:80"
    volumes:
      - ./config:/etc/acme-dns:ro
      - ./data:/var/lib/acme-dns
    restart: unless-stopped
config/config.cfg
This is the main configuration file. Replace the placeholders with your own values:
[general]
listen = "0.0.0.0:53"
protocol = "both"
domain = "acmedns.yourdomain.com"
nsname = "acmedns.yourdomain.com"
nsadmin = "admin.yourdomain.com"   # your email, @ replaced with .
records = [
    "acmedns.yourdomain.com. A YOUR_SERVER_PUBLIC_IP",
    "acmedns.yourdomain.com. NS acmedns.yourdomain.com.",
]
debug = false

[database]
engine = "sqlite"
connection = "/var/lib/acme-dns/acme-dns.db"

[api]
ip = "0.0.0.0"
disable_registration = false
# Using 8181 instead of 443 — Traefik already uses 443 on this host
port = "8181"
tls = "none"
corsorigins = ["*"]
use_header = false
header_name = "X-Forwarded-For"

[logconfig]
loglevel = "info"
logtype = "stdout"
logformat = "json"
The
connectionpath is critical — get this right before you register anything.The default value in many acme-dns examples and the upstream source is
"acme-dns.db"— a relative path. When acme-dns runs inside Docker, that relative path resolves to a location inside the container that is not in your mounted volume. The result: everything appears to work perfectly on first setup, but the moment the container is recreated (after a host reboot, adocker compose pull, or a stack update), the entire SQLite database is silently wiped. Every registered domain credential is gone, and every service relying on acme-dns will fail its next certificate renewal with a403 forbiddenerror.Using the absolute path
/var/lib/acme-dns/acme-dns.dbensures the database lands inside the./datavolume mount and survives container restarts and recreations. After starting the container for the first time, confirm the file exists on your host:ls -la ./data/ # You should see acme-dns.db appear hereIf the directory is empty, the path is wrong and you're storing data in the container layer only.
A few other things to note:
tls = "none"— since acme-dns is on a separate subdomain that only your ACME client calls, and the API call only updates TXT records (no sensitive data), this is acceptable. If you want TLS, settls = "letsencrypt"or point to your own cert files.disable_registration = false— leave this open until you've registered all your clients. Then set it totrueto prevent unauthorized registrations.- Port
8181— if443is free on your server, you can use that instead (change both here and indocker-compose.yml).
Step 4: Build and run
cd acme-dns
docker compose up -d --build
Check that it's running:
docker compose logs -f
You should see acme-dns start up and begin listening on port 53.
Verify DNS is working from your local machine:
dig acmedns.yourdomain.com A
dig acmedns.yourdomain.com NS
Both should return answers pointing to your VPS IP.
Verify the database is persisting to disk:
ls -la ./data/
You should see acme-dns.db present. If the directory is empty, stop here and fix the connection path in config.cfg before proceeding — registering clients against an unpersisted database means you'll have to do it all again after the next container restart.
Step 5: Register a client
With the server running, register a client to get credentials:
curl -s -X POST http://YOUR_VPS_IP:8181/register | jq .
You'll get back something like:
{
  "username": "xxxxxxxx-xxxx-xxxx-xxxx-xxxxxxxxxxxx",
  "password": "xxxxxxxxxxxxxxxxxxxxxxxxxxxxxxxxxxxxxxxx",
  "fulldomain": "xxxxxxxx-xxxx-xxxx-xxxx-xxxxxxxxxxxx.acmedns.yourdomain.com",
  "subdomain": "xxxxxxxx-xxxx-xxxx-xxxx-xxxxxxxxxxxx",
  "allowfrom": []
}
Save this output. These are the credentials your ACME client will use. If the database isn't persisted correctly and the container restarts, these credentials will be gone and you'll need to re-register.
Now, go back to your DNS provider and add a CNAME record:
| Type | Name | Value |
|---|---|---|
CNAME |
_acme-challenge.yourdomain.com |
<fulldomain from above> |
For a wildcard cert that also covers the root, you may need a second CNAME:
| Type | Name | Value |
|---|---|---|
CNAME |
_acme-challenge.yourdomain.com |
<fulldomain> |
This is the only change you ever make to your main DNS zone. Everything after this is handled automatically.
Step 6: Configure your ACME client
Certbot
Install the acme-dns authenticator plugin:
pip install certbot-dns-acmedns
Create a credentials file (e.g., /etc/letsencrypt/acmedns.json, chmod 600):
{
  "yourdomain.com": {
    "username": "...",
    "password": "...",
    "fulldomain": "...",
    "subdomain": "..."
  }
}
Set the ACMEDNS_URL environment variable and request a cert:
export ACMEDNS_URL=http://YOUR_VPS_IP:8181
certbot certonly \
  --authenticator dns-acmedns \
  --dns-acmedns-credentials /etc/letsencrypt/acmedns.json \
  -d yourdomain.com \
  -d "*.yourdomain.com"
Traefik
In your Traefik static config (traefik.yml):
certificatesResolvers:
  myresolver:
    acme:
      email: you@yourdomain.com
      storage: /acme.json
      dnsChallenge:
        provider: acme-dns
Set these environment variables (in your Traefik container or compose file):
ACME_DNS_API_BASE=http://YOUR_VPS_IP:8181
ACME_DNS_STORAGE_PATH=/path/to/acmedns-store.json
acme.sh
export ACMEDNS_BASE_URL="http://YOUR_VPS_IP:8181"
acme.sh --issue \
  --dns dns_acmedns \
  -d yourdomain.com \
  -d "*.yourdomain.com"
cert-manager (Kubernetes)
Use the cert-manager-webhook-acme-dns or the built-in acmedns issuer type. Point it at your server IP and port, and supply the credentials from the registration step.
Handling the port conflict with Traefik
If you run Traefik (or any other reverse proxy) on the same host, port 443 is already taken. The simplest fix — which is what I did — is to run acme-dns's REST API on a different port (8181) and adjust the port setting in config.cfg and the port mapping in docker-compose.yml.
Your ACME clients can usually be pointed at a non-standard port without issues. For example, with Certbot:
export ACMEDNS_URL=http://YOUR_VPS_IP:8181
And with Traefik:
ACME_DNS_API_BASE=http://YOUR_VPS_IP:8181
Important: lock down the API port. Using a non-standard port does not provide security by obscurity — port scanners will find
8181just as easily as443. You should restrict access to this port to only the hosts that need it. A few ways to do this:
-
Firewall rules (recommended): On Hetzner, add an inbound rule in the Cloud Console Firewall that allows TCP on port
8181only from your ACME client's IP address(es). Do the same at the OS level with UFW:ufw allow from YOUR_ACME_CLIENT_IP to any port 8181 proto tcpReplace the open rule (
ufw allow 8181/tcp) you may have added earlier. -
allowfromin acme-dns: When registering a client, pass its IP in theallowfromfield. acme-dns will reject update requests from any other IP for that credential:curl -s -X POST http://YOUR_VPS_IP:8181/register \ -H "Content-Type: application/json" \ -d '{"allowfrom": ["YOUR_ACME_CLIENT_IP/32"]}' | jq .This is a good second layer, but it only protects the
/updateendpoint — the/registerendpoint is still open unless you also setdisable_registration = trueafter initial setup. -
Private networking: If your cloud provider supports private networks (Hetzner does), you can bind the acme-dns API to a private interface instead of
0.0.0.0, so the port is never reachable from the public internet at all. Setip = "10.0.0.x"(your private IP) inconfig.cfg.
The safest combination is firewall rules + disable_registration = true once you've registered all your clients. The allowfrom restriction adds a useful extra layer but shouldn't be your only control.
Alternatively, if you want to keep the standard port, you could:
- Put acme-dns on a separate server entirely.
- Route
acmedns.yourdomain.com:443through Traefik as a reverse proxy to the acme-dns container on an internal port. (This works but adds complexity — Traefik proxying the tool that issues Traefik's own certs requires some care to avoid a chicken-and-egg problem on first boot.)
For simplicity, the custom port approach with proper firewall rules is the most straightforward.
Security hardening (optional but recommended)
Once you've registered all your ACME clients, lock down the registration endpoint:
[api]
disable_registration = true
You can also restrict which IP addresses a given credential can update records from, by specifying allowfrom during registration:
curl -s -X POST http://YOUR_VPS_IP:8181/register \
  -H "Content-Type: application/json" \
  -d '{"allowfrom": ["YOUR_ACME_CLIENT_IP/32"]}' | jq .
And make sure the data/ directory (which holds the SQLite database) is never committed to version control — add it to .gitignore:
data/
Wrapping up
acme-dns is one of those tools that solves a real security problem elegantly. You get fully automated wildcard certificate renewals without ever giving an API token broad write access to your DNS zone. The DNS-01 flow stays completely automated, and the exposure surface is minimal.
The Docker setup makes it easy to run alongside whatever else you have on your VPS. Even with a port conflict, a single config change is all it takes to get everything working.
The one gotcha worth calling out again: always use an absolute path for the database connection string. The default relative path "acme-dns.db" is one of those silent failures that works perfectly until a container restart wipes everything — and debugging why your certificate renewals suddenly started returning forbidden two months later is not a fun afternoon.
The full project files (anonymized) are available on GitHub: github.com/jevellangelo/acme-dns
 jevellangelo